A Guide to Choosing the Right Garage Door Opener for Your Home
Homeowners or property owners looking to upgrade their garage door opener should understand a few basics about selecting the right model. With various types, brands and exciting new features on the market, narrowing down the perfect one can be challenging without some guidance and direction. You’ll want an opener that accommodates your budget while offering features for enhanced performance, efficiency and security.
This garage door opener buying guide explores some essential considerations to determine the right option for your home or rental property. We’ll also cover some of the best garage door opener models and the different features they offer.
How to Pick the Right Garage Door Opener: Key Considerations
Your garage door is an investment in your home’s security and aesthetics. The opener you choose will directly impact your door’s functionality and tech capabilities. A few factors can inform your decision-making and ensure you select the right opener for your wants and needs.
Here are some factors to consider when selecting a garage door opener:
1. Type
The best garage door opener will depend on your available space and the noise level you are comfortable with. Some popular types of openers include:
- Chain-driven door opener: This type is often the most cost-effective and uses a durable chain to open and close your door. It is best for budget-conscious consumers, those who are not as worried about noise and homes with especially heavy garage doors.
- Belt-driven door opener: The belt on these openers allows for quieter operation than chain-driven models while still offering the same power and reliability.
- Jackshaft door opener: A jackshaft garage door opener takes up less ceiling space than other types. It also accommodates quieter, smoother operation.
2. Features
Different garage door openers have unique capabilities and details that can serve various everyday needs. Explore some advanced features to look for when investing in a new opener:
- Smart features: If you want to control your garage door from the convenience of your smartphone, select an option that has Wi-Fi connectivity and links with a mobile app. You can use these smart features to increase control, set automated schedules, monitor activity and illuminate your space.
- Cameras: You can find door openers with high-quality, built-in cameras that support live streaming and video storage. Some also feature two-way audio tools for real-time communication.
- Battery backup: A battery backup will help your household enter or exit your garage during a power outage or emergency situation.
3. Brand and Price Point
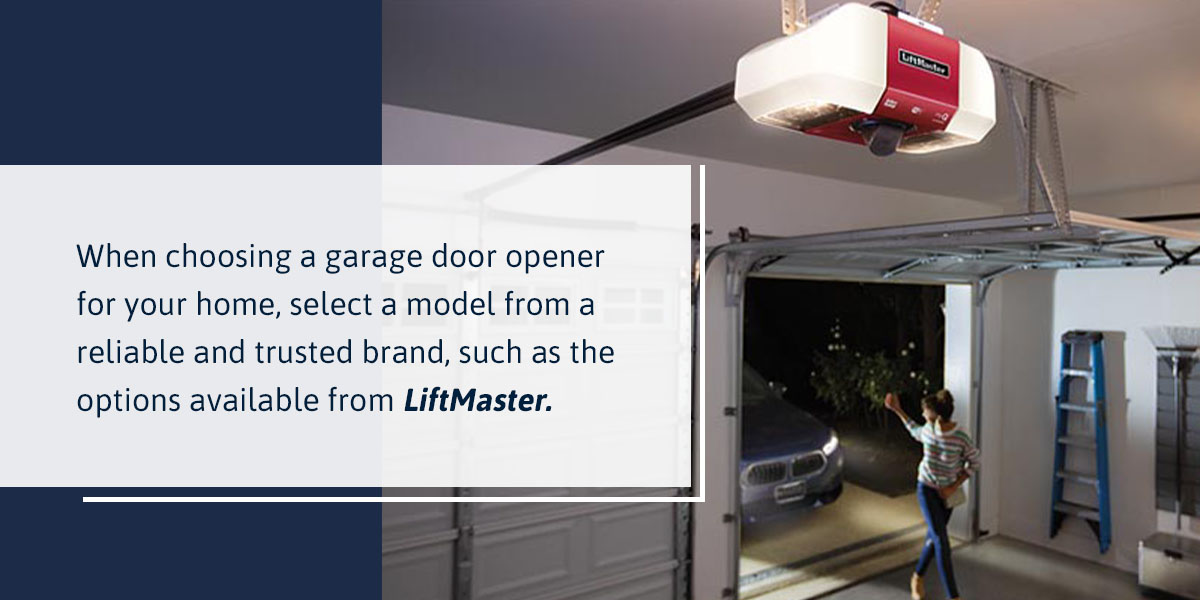
When choosing a garage door opener for your home, select a model from a reliable and trusted brand, such as the options available from LiftMaster. These garage door openers are built for longevity and durability, so you can enjoy peace of mind and fewer maintenance and repair needs. Investing in a high-quality model can provide long-term savings.
Examine your budget and determine which features you’d like to introduce to your garage. Once you have a general idea of how much you can spend, you can narrow down the technologies and capabilities most essential to you and your family.
4. Safety and Security
Security should be top of mind when selecting a new garage door opener for your home or rental property. Consider whether you’re interested in one or more of these safety features:
- Sensors: All LiftMaster garage door openers feature safety sensors, which help prevent accidents and injuries by stopping the door’s operation when an obstruction is present.
- Lights: Motion-detection and remote-control lights help illuminate your garage, simplifying parking and enhancing security.
- Electronic protection: Some opener models allow you to combat forced entry from the safety and convenience of your mobile device.
5. Performance
Performance is among the most important considerations when selecting the ideal garage door opener. Consider the design and layout of your home. For instance, if your garage is close to your living areas, you may want an opener that supports quiet and smooth operation.
You’ll also want to pick a durable, vibration-free model that supports efficient operation. A fast, reliable opener can accommodate and streamline your family’s busy daily routines.
6. Installation
Professional installation is always best when it comes to your garage door and opener. These systems are extremely heavy and can be dangerous if you are not well-versed in installation best practices. An expert will ensure your opener suits your door’s weight, size and materials.
If you’re still uncertain about how to choose the right garage door opener for your space, consult with a professional installer. They can help you find a suitable model that’s compatible with your door and architecture.
Top Garage Door Openers to Consider
LiftMaster is an industry-leading brand for quality garage door openers. It equips its models with innovative features to support reliable and convenient operation.
Learn more about some of the top openers from LiftMaster:
- AC Chain Drive 81650 Wi-Fi Garage Door Opener: This model works with the myQ® app and enables you to control the door from your smartphone. It works with Amazon Key for secure package deliveries, and its DC motor supports virtually silent operation.
- AC Chain Drive 85870 Wi-Fi Garage Door Opener: This option was created for the heaviest garage doors. It features the strongest motor in the LiftMaster lineup and an I-beam rail system for optimal support and functionality.
- Elite Series 98022 Wall Mount Wi-Fi Garage Door Opener: The Elite Series is a sleek, compact jackshaft door opener. It takes up less space than other models and can connect to your home Wi-Fi. This opener also features various security features, including motion-detection lighting.
- Secure View™ Ultra-Quiet 87504-267 Smart Opener: If you want a high-tech opener with a camera, battery backup and corner lighting, this model is ideal. It links with Amazon Key, and you can use the built-in camera to monitor your deliveries.
- Secure View™ Ultra-Quiet 84505R Smart Opener: This advanced opener has a powerful belt drive system, quiet operation and a camera for monitoring your space. It also features two-way audio to streamline communication from your smartphone to your garage. Its integrated LED lighting helps illuminate your space and enhance security.
Consult With the Experts From Quality Door Company

If you’re interested in upgrading your garage door opener, turn to the expert technicians at Quality Door Company. We’ve served homeowners and property owners in Western Michigan for more than 40 years, and our customers count on us for the highest-quality services and products.
Our garage door experts can help you determine which LiftMaster opener model suits your home or rental property best. We also offer professional installation services so your garage is functional as soon as possible.
Are you ready to install a new LiftMaster garage door opener? Browse the inventory from Quality Door Company, and request a complimentary estimate online today.
Understanding the Components of a Garage Door
A garage door is a valuable home feature because of its protective and aesthetic qualities. Various features and components allow a garage door to perform as expected regarding functionality and style. In this post, we’ll discuss the components that make your residential garage door work.
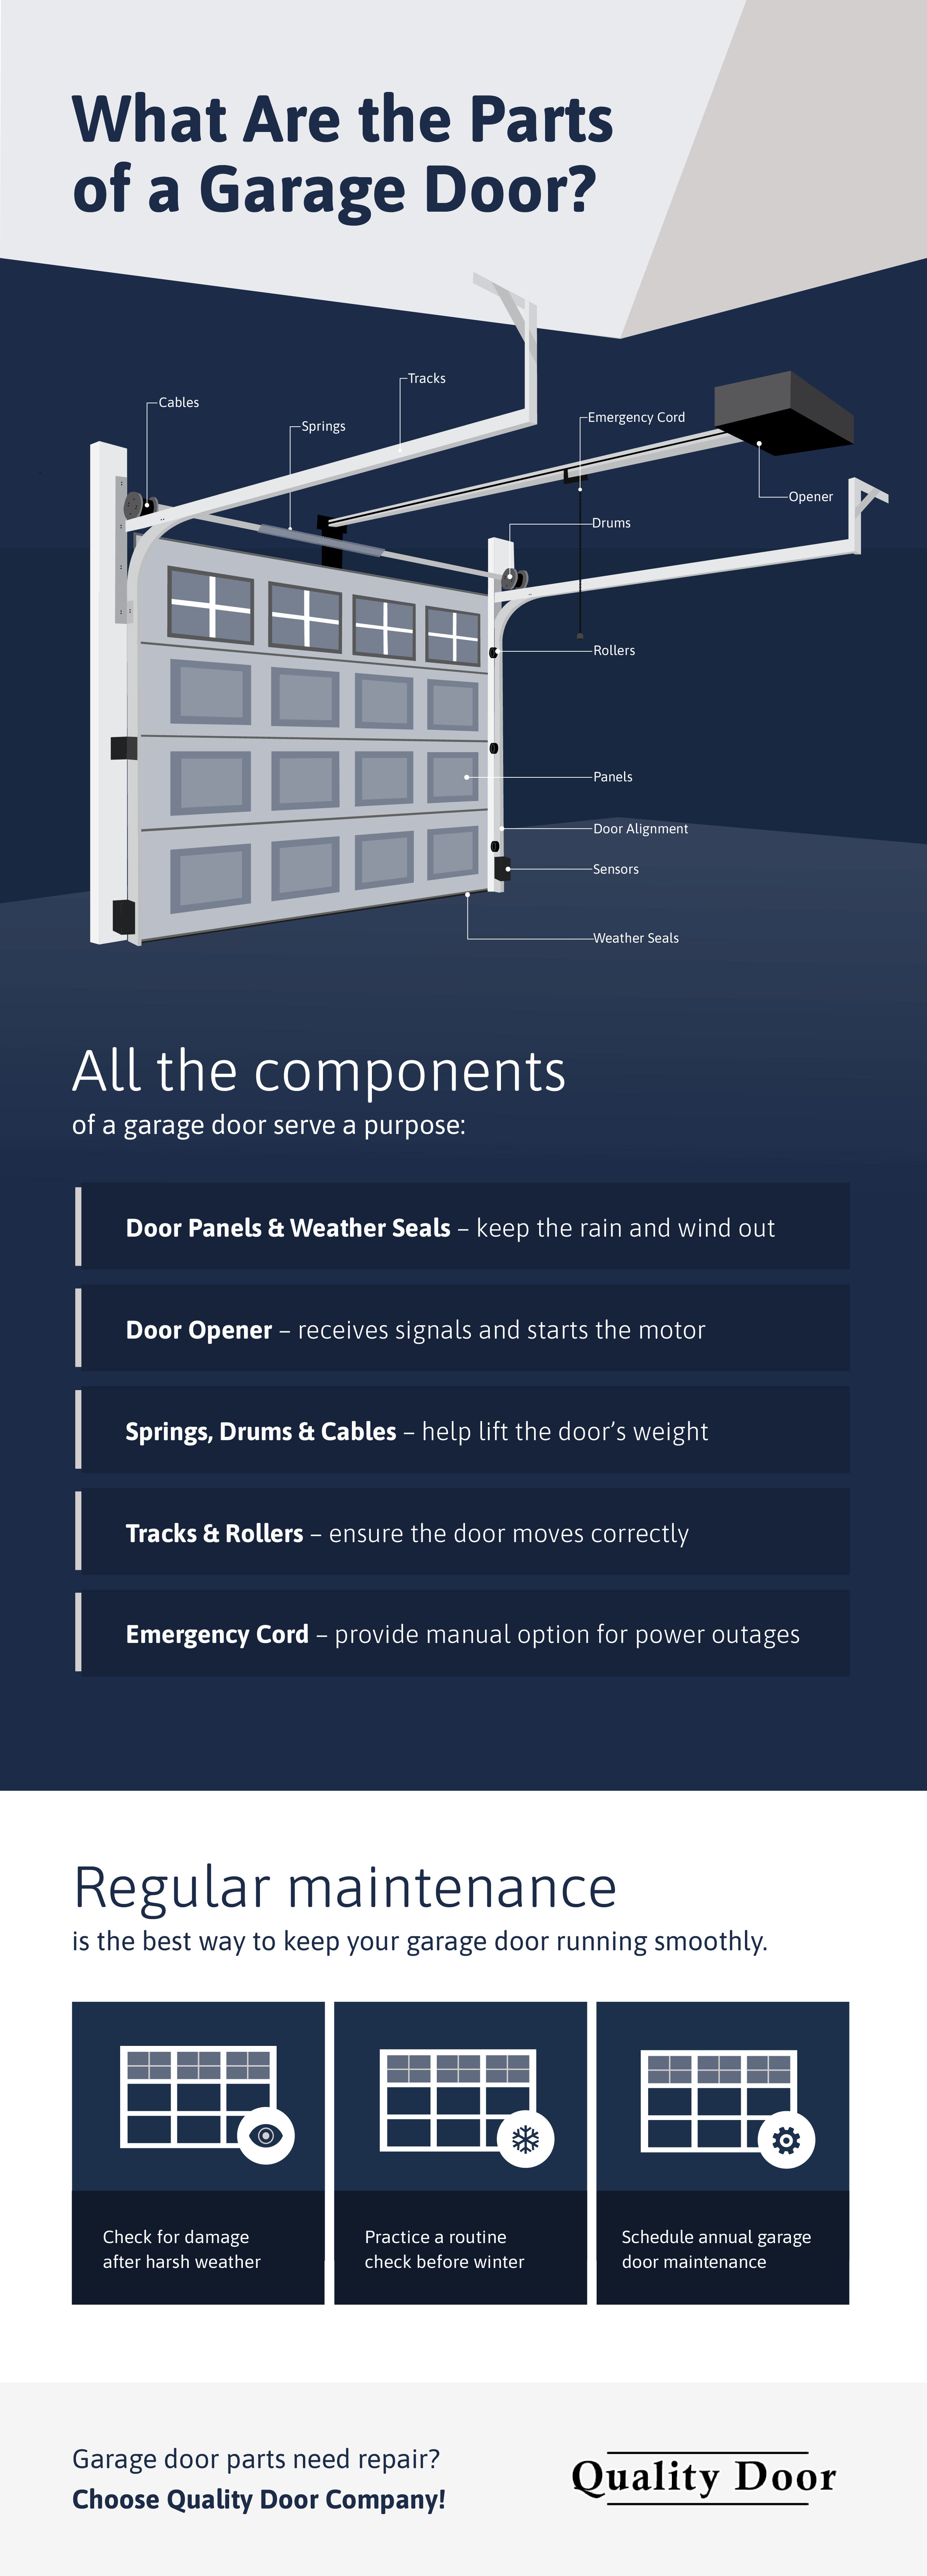
What Are the Parts of a Garage Door?
Garage doors feature five main elements that work together to achieve the functionality and style you expect:
- Door panels and weather seals
- Door opener
- Springs, drums and cables
- Tracks and rollers
- Emergency cord
An honorable mention to this list is your garage door safety sensors. You can check out our other blog post that goes in-depth on that part of your garage door system.
Door Panels and Weather Seals
Your garage door’s main purpose is to protect your belongings from anything outside. The panel and weather seal are vital to any garage door’s performance.
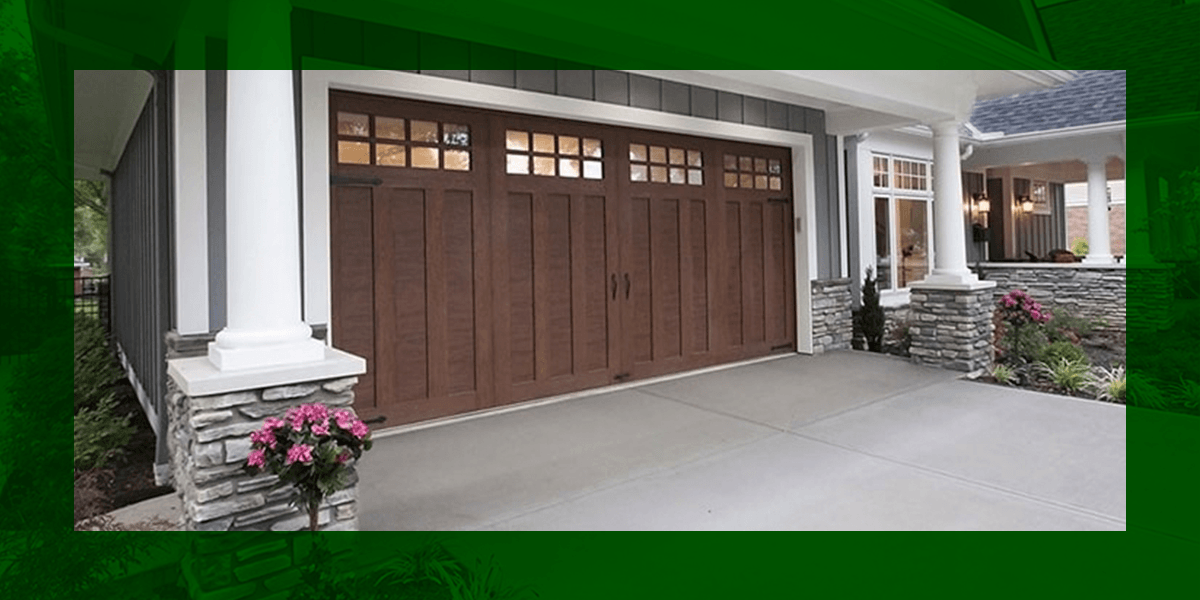
A garage door panel forms a sturdy barrier between your belongings and the outside world. The right garage door panel will protect the interior against damage during a storm and prevent theft. You can choose between numerous door materials that each offer different levels of strength. Common garage door panel materials include wood, fiberglass, aluminum and steel. The door panel is also the key aesthetic feature, so choose a style that complements your home.
Weather seals also boost your door’s protective qualities. A weather seal is a strip of rubber or vinyl that fills the gap between the door panel and the surfaces above, below or beside it. Weatherstripping helps keep water and dust out of your garage while providing insulation.
Door Opener
It’s critical that your garage door opens and closes at your request, but only when you request it. That’s where a garage door opener comes into play.
The garage door opener is a mechanical system that moves the panel on its tracks. Every garage door opener comprises a motor and sensors. The motor drives the other components that lift or lower the door. The sensors tell the motor when to stop by detecting the door’s proximity to the ground and obstructions that could impede the process.
Springs, Drums and Cables
A garage door panel is heavy, which is why it needs features that support its weight as it opens or closes. The springs, drums and cables create a counterbalance assembly that helps the opener lift and lower your door panel gracefully.
Garage door springs are metal coils above the door that support its weight. The tension from the springs prevents the door from slamming to the ground and offers the strength needed to pull the door to the top. The spring tightens as the door closes, storing energy that it can use to lift the garage door when you want to open it.
When your drive mechanism is lowering the garage door, the springs transfer power to the drums at the top of the garage door opening. The drum is an aluminum wheel that holds a steel cable running to the bottom of the door. As the spring unwinds, it causes the drum to rotate and pull the cable, lifting the door.
Tracks and Rollers
The tracks and rollers stabilize the garage door as it opens and closes. Each garage door has two tracks running vertically along the door panel’s left and right sides. The tracks trace the garage door opening before curving to run parallel to the ceiling. They establish a path for the door to follow as it rises and lowers. The rollers are small wheels that connect the door to the tracks and allow it to move smoothly.
Emergency Cord
The emergency cord is a bright string that activates the garage door opener’s safety mechanism. Every garage door includes a manual safety mechanism that deactivates the motor and disconnects it from the panel. Disconnecting the motor and panel stops the door from opening or closing to prevent an injury. The emergency mechanism will also allow you to operate the garage door manually by pulling the garage door along the tracks during a power outage when the automatic opener is offline.
Taking Care of Each Garage Door Component
With so many parts that need to work together for your garage door to operate, maintenance is essential. Regular maintenance will ensure your door opens and closes smoothly while also providing the protective and insulative qualities you expect.
While garage door maintenance is important to do often, performing the task safely requires professional training. Always contact a garage door specialist for maintenance and repair services.
Here are some tips for maintaining your garage door:
- Check for damage after harsh weather.
- Inspect and repair your garage door annually before the winter.
- Schedule garage door maintenance with a trusted professional.
Schedule Garage Door Maintenance With Quality Door Company
Quality Door Company maintains and repairs garage doors for homeowners in western Michigan. We conduct thorough inspections to highlight any issues and keep dependable garage door parts on hand to perform timely repairs. Our experienced technicians will prepare your garage door for years of efficient operation, so contact us online to schedule a maintenance appointment.
Liftmaster Opener Error Codes & How to Fix Them

Your garage door is a vital part of your home’s security system. Even more so, the opener is responsible for making sure the door performs its function of opening and closing on demand. If there are issues with the opener, you inadvertently are at risk of break-ins and other safety concerns.
Sometimes, you will experience error codes when you are using the opener. You might be able to resolve the issue easily or you may need the help of a professional garage door contractor to fix it.
Here are the most common Liftmaster operator codes, what they mean and what you can do to investigate the issue first-hand.
Understanding the Diagnostic Codes
First, you must understand the various Liftmaster troubleshooting codes and what they potentially warn you about. Depending on your garage door opener model, you are likely to be alerted to a problem in a few ways:
- Arrows: Security+ 2.0 opener models made post-2011 will have this feature, which is commonly found on most openers. Up and down arrows will flash repeatedly, pausing in between.
- Learn button: This feature may not be available for opener models after 2022. If you locate this button on your opener and there is an issue, an LED light situated next to the learn button will flash, pause and repeat.
- Sensors: You can can use the lights on the sensors to diagnose any issues on either or both sensors. A misalignment can be diagnosed if the green light is out on the receiving eye. The sending eye will have an amber-colored eye. If both lights are out then you might have a different problem.
Additionally, your opener light will blink numerous times to indicate something is wrong, so watch out for both flashing indicators.
Liftmaster Error Code Meanings
There could be many reasons your Liftmaster is presenting blinking codes. In most cases, a few commonly recurring issues can easily be resolved without seeking external help. If any of the issues are not listed, you can consult your Liftmaster user manual for more extensive information on how to fix Liftmaster error codes.
Sensor Issues
One of the main reasons you may find an error is when there is an issue with one or both sensors. They could be obstructed, disconnected, misaligned or otherwise broken. It is important to see if the amber and green lights on the sensors themselves are lit to determine what could be causing them to malfunction.
If you see the following opener error code, check the sensors for obstruction, disconnection, misalignment or breakage:
- Up arrow: 1x flash
- Down arrow: 1x flash
Issues with the sensor most often result in the garage door not closing completely. Some common sensor issues include:
- Obstructions: If there’s something in the way of the sensor, the door will not close. Remove anything that may obstruct the sensors. Temporary obstruction caused by someone walking past the sensors will result in the green light flickering briefly before resuming normal operations.
- Disconnected sensor wires: The sensor wires that are connected to the opener may have been disconnected. Reconnect them and check if they work.
- Misalignment: If the sensors get moved off track, they won’t function properly. Realign the sensors and look for a stationary green light and a stationary amber light to indicate successful realigning.
- Broken or cut sensors: If the sensor wires are cut or broken, they won’t connect to the sending eye. Check if they are cut and replace them if they are.
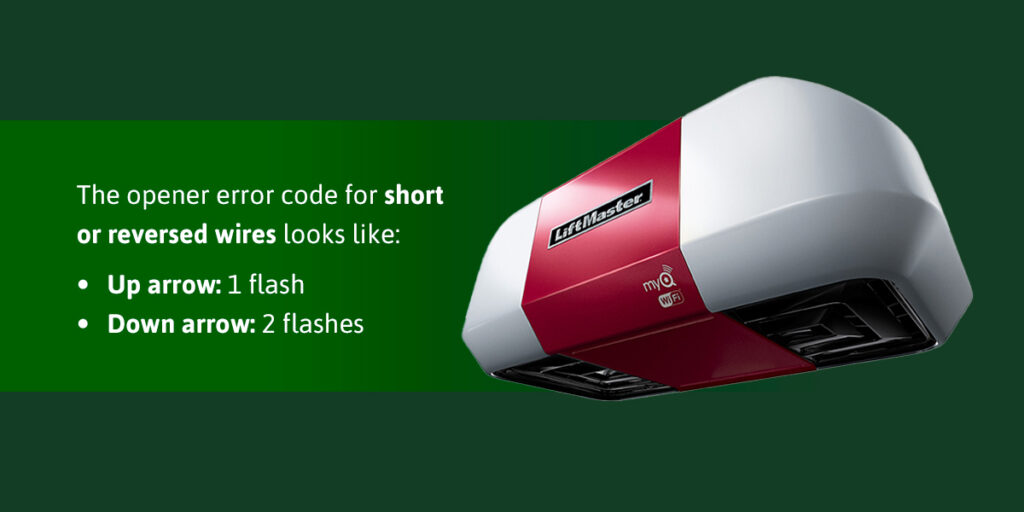
Short or Reversed Wires
Where wiring is concerned, it is always best to do a thorough check to see that there are any signs of damage, fraying or disconnection at the sensors and the opener.
The opener error code for short or reversed wires looks like:
- Up arrow: 1 flash
- Down arrow: 2 flashes
You can identify this issue when the error shows for four seconds or longer. The garage door indicators are the same for a wire shortage as for sensor issues since they relate to the sensor and opener wires. The door will be open and when you command it to close, it will push up and stay open.
To fix this error code, check the wires at the sensors and opener to ensure they are properly connected. If there is a short, the wires will need to be replaced.
Door Control Panel
The wires on your door control panel may also short or come loose at some point, breaking the connection between the panel and the opener and preventing it from opening.
The opener error code for short wires on the door control panel is:
- Up arrow: 1 flash
- Down arrow: 3 flashes
This issue occurs when the wires short-circuit for four seconds or longer. Your remote will open the garage door, but if you press the control panel, it won’t react. You also won’t see any lights on the control panel. To resolve this issue, ensure the wires are connected properly on the opener and control panel. If there are any issues with the wiring, it’s often best to contact a professional for service.
RPM Issues
You may experience issues with the RPM sensor that could return multiple errors. They could relate to a lack of movement when you initially open the garage door or after the garage door motor switches off.
The opener error codes for RPM issues include:
- Up arrow: 1 flash
- Down arrow: 5 or 6 flashes
Remember, the arrows will flash repeatedly with pauses in between to differentiate the type of error you are dealing with. If the problem lies with the RPM sensor, the door will close despite the motor being off. If the manual release has come off, you can reconnect it. In the event that doesn’t resolve the issue, contact a service technician.
Logic Board Errors
Logic board errors may indicate the broadest range of errors since you could be having issues with the logic board for multiple reasons. This is characterized by the up arrow flashing twice instead of once, as you may have noticed with the previous error codes where the up arrow flashes once.
Any of the following opener error codes may signal an issue with the logic board or one of the parts on it:
- Up arrow: 2 flashes
- Down arrow: Between 1 and 5 flashes
The door may not open and close properly or even function if something is wrong with the logic board. Inspect the extra battery thoroughly and unplug the opener from the power source. If the issue persists, you may need professional help from a garage door contractor or a replacement logic board.
Power Loss
Sometimes, the power could trip without you knowing. You might think something is wrong when you see this error when there’s nothing to be concerned about.
Check for the following opener error code to see if it could be related to an electricity outage:
- Up arrow: 3 flashes
- Down arrow: 2 flashes
The door opener won’t function without an electricity source. Check if the power tripped or is out for some other reason and switch it back on. Alternatively, you could use the manual release to open and close the door until the power is restored.
If any other errors present and you have done all the necessary checks on the cable tensioner, rollers, springs and hinges you may have to consult an expert for advice on what could be wrong with your garage door.

Let Quality Door Company Help You With Your Garage Door
Quality Door Company can help you clear Liftmaster error codes and resolve any other issues. We have an excellent team of expert technicians who are eager to sort out your garage door so you can get back to using it.
Visit one of our showrooms or warehouses to view our wide range of garage doors and openers and experience our top-class customer service first-hand. Or request an estimate or service online and we will get back to you promptly.
Garage Door Opening Randomly? Here’s What to Do
If you come home from a long day at work to discover that your garage door has been open all day, it might not be because you forgot to lower it on your way out. A garage door that opens unpredictably can indicate a sensor, power, remote or other mechanical issue. Luckily, if you notice your garage door randomly opening, you can often fix it yourself.
Look at the following reasons your garage door opens by itself and how you can fix it.
Common Causes — and Fixes — for Garage Doors Opening on Their Own
The causes of garage door malfunctions can range from a minor sensor mishap to a power surge issue that requires the help of an experienced repair team. Troubleshooting why your garage door opens unpredictably can help you decide whether it’s a quick DIY fix or a situation that requires professional service.
Explore the following causes of garage door malfunctions and how to fix a garage door opening by itself.
1. Safety Sensors
One of the simplest fixes for garage door malfunctioning is removing debris, objects or vehicles from your door’s sensors. Safety sensors detect objects in the door’s path. If someone or something is in the way, the sensors will force the garage door to reopen to avoid injuring or damaging anything.
You’ll notice the sensors working their magic each time you pass under a garage door before it can completely close, causing the door to open back up again. While these safety sensors protect you and your possessions, they may also cause your garage door to open randomly.
Luckily, safety sensors causing your door to open are an easy fix. Ensure no stray objects are blocking the sensors so your garage door can close fully. When you park in your garage, pull forward far enough that your car is past the sensor’s detected areas. Freeing these few inches of space can quickly eliminate garage door malfunctioning issues.
2. Overlapping Signals
Like radio frequencies, your garage door signal can trigger other garage doors around your neighborhood without noticing. Your next-door neighbor may close their garage door and yours too. This occurrence happens much more often than you may think, so connecting with your neighbors can be the best action if your garage door is randomly opening.
If your next-door neighbors’ garage door opener or remote syncs to your home’s door, you can stop your garage door from malfunctioning by troubleshooting. The following steps should program your remote control and opener to only sync to your garage door:
- Check that the opener connects to power and the door’s manual lock is off.
- Ensure the opener’s antenna is in the correct position to receive signals from the remote control.
- Locate the Learn button on your garage door opener. This button is typically next to the antenna.
- Press and hold the learn button for 7 seconds, or until the LED light goes out; this will clear the memory so no radio signals will operate your door.
- Press the Learn button one more time and release.
- Choose a button on your remote control to sync to your opener. Hold it for three seconds before releasing it.
- If the steps are successful, you will notice a flashing LED light on the remote, indicating that it syncs to the opener.
Open and close your garage door using your opener and remote control before asking your neighbor to try their accessories on your door.
3. Stuck Button Controls
It’s common for a garage door button to decrease in functionality due to dirt buildup, old age or exterior damage. If a garage door button is stuck, your door will likely need more communication between both machinery pieces to operate smoothly.
If your wall-mounted button gets stuck, the fix is quick and easy. The best solution to this garage door malfunction is to replace the button. Then, your door will operate as usual, and you’ll increase your new opener’s life span. Soon, you can easily open and close your garage door, thanks to the functionality of a brand-new garage button feature at your fingertips.
4. Weather Damage
Weather is not typically a garage door’s best friend. Harsh wind, dropping temperatures and sweeping rainstorms can cause garage door malfunctions before you can prepare your garage for the changing seasons. If your door won’t close, this issue could signify weather-related damage.
A door stuck in its tracks is one of the most common results of temperature fluctuations that cause the garage door to expand and contract. The sizing changes result in a faulty door jamb fit, meaning your door will not open or close correctly. If you notice a stuck door, moisture damage or weather-related dents, the best action is to replace your garage door.
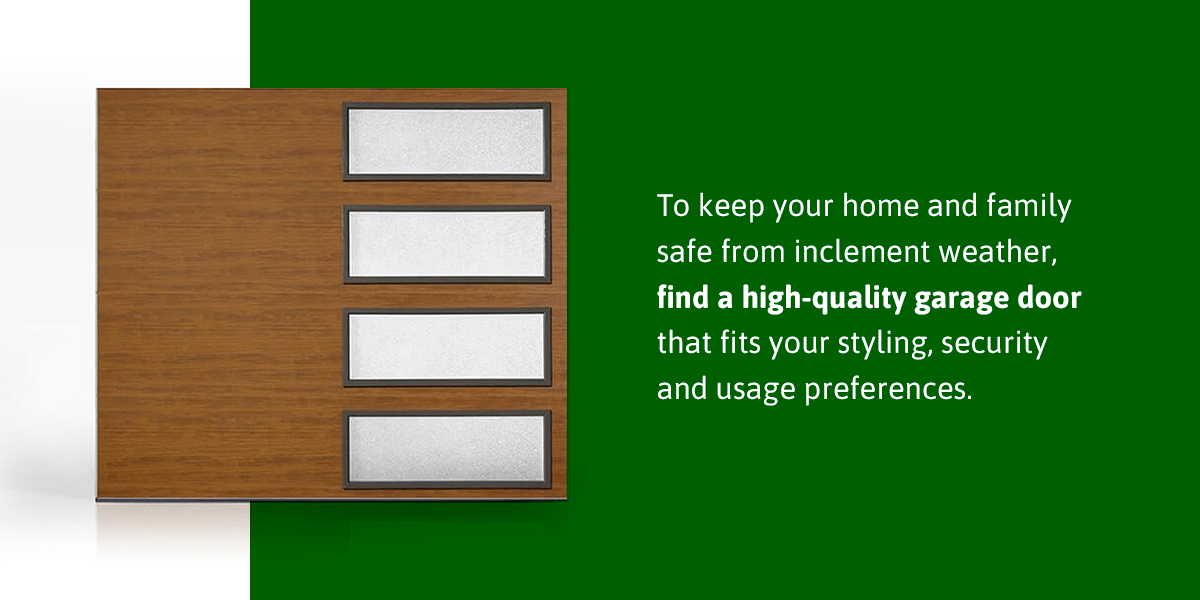
Weather damage is a tricky fix, especially since these factors decrease the life span of trusted garage doors. To keep your home and family safe from inclement weather, find a high-quality garage door that fits your styling, security and usage preferences.
5. Power Surge
Power outages and surges can cause temporary garage door malfunctions. While your door may open on its own or seem stuck in a position for a few minutes, this issue will typically resolve itself. Wait until your home’s power supply stabilizes, give your garage door opener a few minutes to readjust to the returned power and use your remote control to activate your garage door.
If the power takes a few days to return to normal, your garage door’s manual release function can get you in and out of the house. Pull the red release cord connected to the opener and manually lift and shut the garage door. Pulling the red release cord toward the garage door while it’s closed can reset your door so you can easily use your remote control again in no time.
6. Old Remotes — Before 1993
Homeowners with old garage door remotes face the same challenges as the causes of garage door malfunctions above. Garage door remotes and openers older than 1993 have a fascinating past, including reasons to avoid these decades-old mechanic faults.
In the early 1990s, the U.S. government deemed garage door remotes a safety hazard, as doors without sensors would open and shut unpredictably. To avoid any more harm to homeowners and their families, Congress passed the Consumer Product Safety Improvement Act in 1990. This mandate required garage door openers to update with the latest IR sensors ANDI 325. LiftMaster® openers were revolutionary in 1993, quickly becoming the safest and best-selling garage door operators of their time.
If your garage door remote is older than 1993, we recommend installing new LiftMaster openers and a remote system. Replacing your openers can ensure a longer life span for your garage door’s open and close mechanics while prioritizing safety for your whole family.
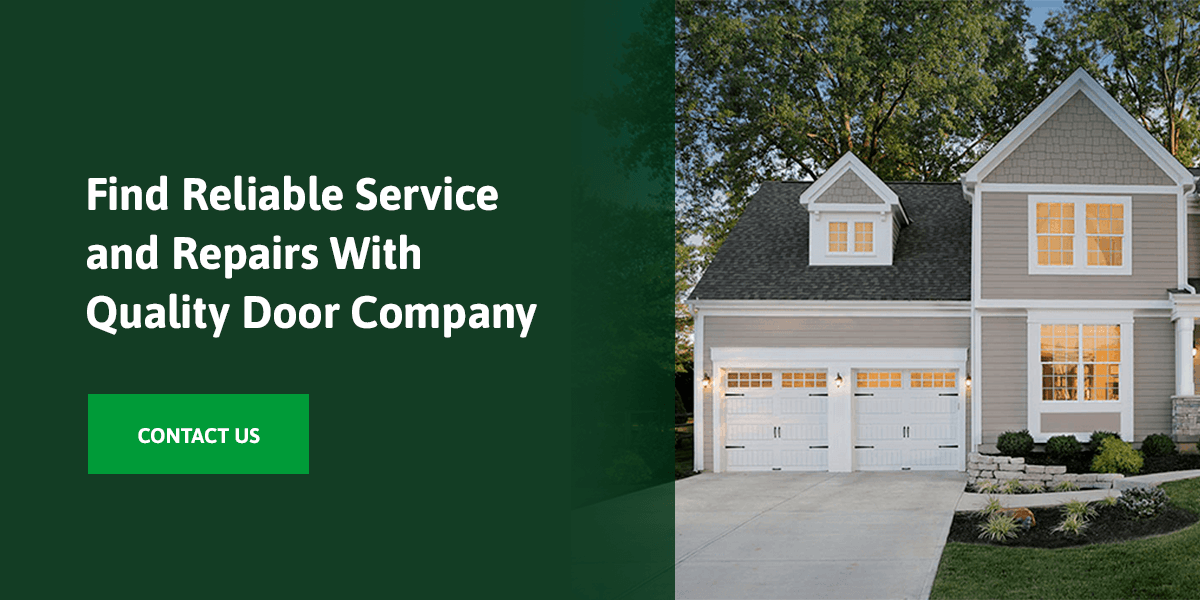
Find Reliable Service and Repairs With Quality Door Company
When garage door malfunctions strike when you least expect it, Quality Door Company is here to help. With over three decades of offering quick and efficient services to the West Michigan area, we can help assess your garage door repair needs so you can return to your typical routine in no time. Our services include spring, panel, opener and cable repairs right in your home. No matter the cause of your garage door malfunction, we can look at all parts of the door to find the best route to restore normalcy.
At Quality Door Company, we prioritize preventive maintenance to avoid your average garage door issues. You can schedule annual maintenance appointments to increase your door’s life span, keep your family safe and reduce repair costs.
Schedule your appointment with us today to start on your garage door repairs.
How to Program a Garage Door Keypad
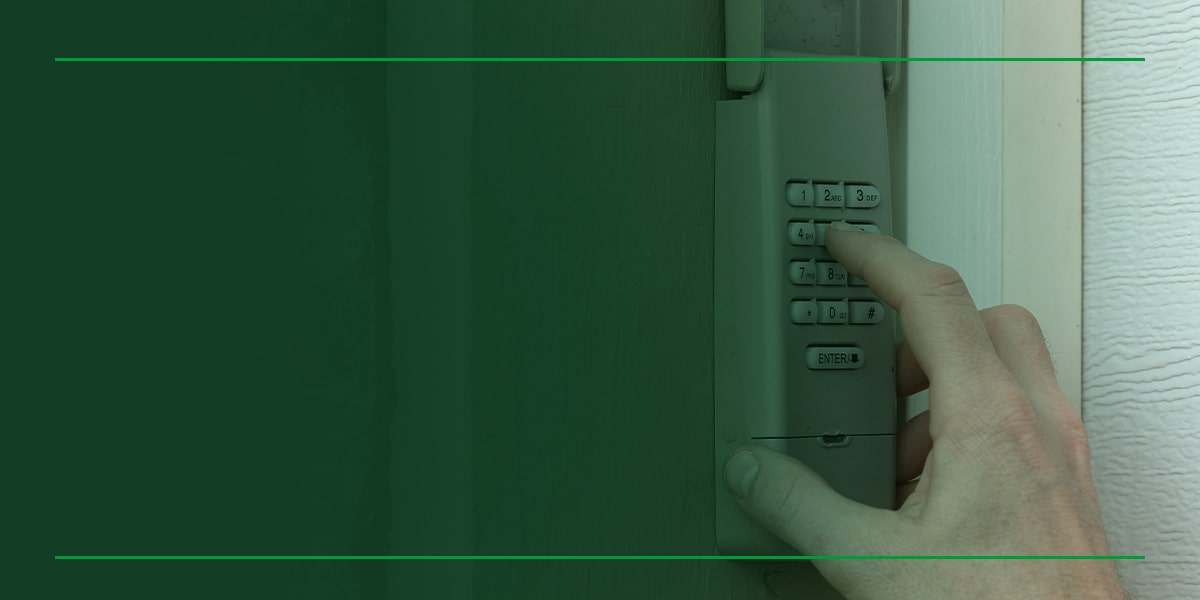
If you purchase or own any modern garage door system, it likely includes a keypad installed outside your garage. These keyless entry devices provide convenience and security — anyone who knows the current personal identification number (PIN) can operate the door without using a remote control or key to unlock it.
A garage door keypad offers several benefits for homeowners, especially in busy households where multiple individuals are coming and going throughout the day:
- Prevents the need for extra keys to give to every member of the household.
- Reduces concerns about lost keys — you’ll only need to enter the correct PIN to gain access.
- Eliminates worries about missing or malfunctioning remote control units.
- Offers the capability to link to a home’s security system for extra protection.
- Allows access to your house to designated individuals like neighbors or delivery people — you can easily change the PIN after they leave).
Are you Ready to Program Your Garage Door Keypad?
At Quality Door Company, we’re pleased to offer innovative, high-performing LiftMaster® garage door openers to homeowners throughout western Michigan that include advanced, easy-to-use keyless entry systems. Programming a LiftMaster keypad is a simple process:
- Locate the Learn button, which you’ll find on the opener or the wall control unit depending on your model.
- Press and release the Learn button. If your opener includes a MyQ control panel for connection to a smart home system, you’ll need to perform this step twice.
- Wait 30 seconds and then key in a unique four-digit pin and press the Enter button.
- Depending on which LiftMaster opener model you own, you’ll either see blinking lights or LED lights that turn off to indicate that the system has accepted your PIN.
- After 10 seconds, enter your PIN to ensure it is working correctly.
Changing the PIN at least twice a year is important to maintain your security. You should also update the code if you provide it to anyone for a one-time purpose or if you suspect that an unauthorized individual has discovered your PIN.
Get Help Programming Your Garage Door Keypad
If you live in Holland, Muskegon, or elsewhere in western Michigan, Quality Door Company is available to help with your keypad programming needs. Our experienced service technicians can walk you through the process and ensure you understand how to operate your opener correctly and safely. Contact us to request a convenient service appointment today!
How to Program a Garage Door Remote

Many homeowners instinctively reach for the garage door’s remote control unit as they guide their vehicle into the driveway. However, if you press the appropriate button and nothing happens, it may be time for a remote control upgrade.
Troubleshooting Your Garage Door Opener
Before you purchase a new remote, you might want to ensure that another problem isn’t causing the issue. Start by replacing the unit’s batteries, especially if it’s been a while since you’ve changed them. You can also try moving the device closer to the door to make sure it’s not out of range.
If that doesn’t solve the problem, you can perform these opener troubleshooting steps:
- Verify that the opener is plugged in and the circuit breaker is in the proper place.
- Check that you haven’t accidentally activated the door’s manual lock.
- If the opener has an antenna to receive a signal from the remote, make sure that it’s in the correct position and hasn’t sustained damage.
- Test the wall switch that operates the opener. If nothing happens, it may be faulty and you’ll have to replace it.
- If the door opens correctly but won’t close when operating the remote, it likely means that one or both of the photo-eye sensors (located at the bottom of the opening on each side) isn’t working. These devices trigger the auto-reverse mechanism, an important safety feature that prevents the door from falling on people or objects.
Garage Door Remote Control Programming Steps
In some cases, reprogramming the remote control unit is all it takes to get your garage door working again. At Quality Door Company, we sell and service LiftMaster®openers that set the industry standard for quality, performance and reliability.
Programming a standard LiftMaster remote model is a simple, straightforward process:
- Take the remote to the opener and locate the Learn button on the latter. You’ll likely find it on the same side as the antenna.
- Press and release the Learn button.
- Within 30 seconds of pressing the opener’s Learn button, push the button you are programming on the remote for three seconds and release it. A flashing LED light indicates that the remote is working properly.
Quality Door Can Fix Garage Door Opener Issues
If you live in Grand Haven, Benton Harbor, or elsewhere in western Michigan, you can trust the experts at Quality Door to program your garage door or troubleshoot and repair the opener. Contact us to request service today!